


In this tutorial you will master how to build a website mockup template in photoshop, using the smart object tool.
Before we get started, we need a laptop or desktop background image. In this tutorial, I will be using a laptop background image.
These are the quick steps to create website mockup template in photoshop.

1. Open the laptop or desktop background image you want to use for this template. by pressing Control or Command O
2. Put the background image resolution to 150px. you can make this change by going to photoshop Menu>image>image size>resolution
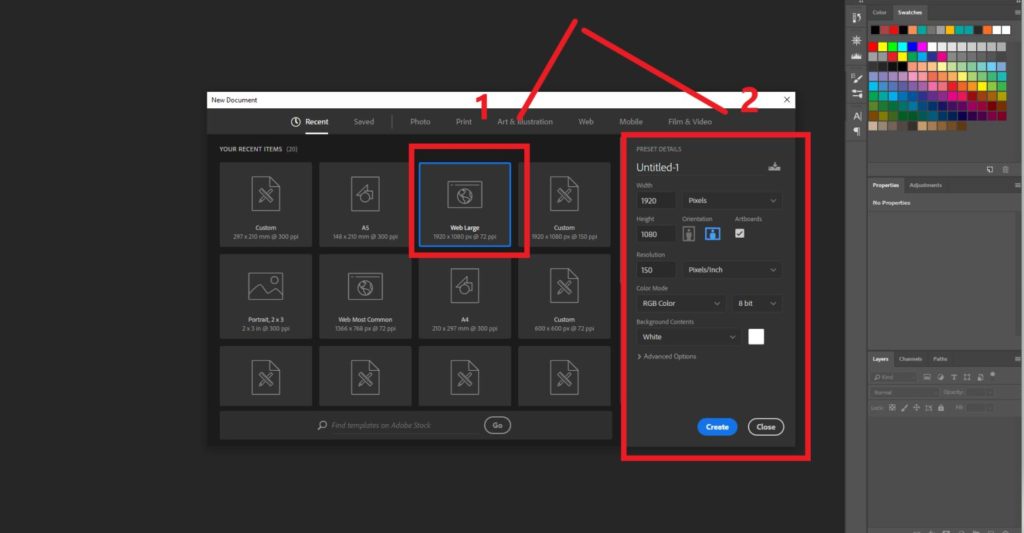
3. Create a new document by pressing Control or command+N in a separate window
4. Set the the document size to 1920X1080px and set the Resolution: 150px , Color Mode: 8bit. View the image below.
5. Drag and drop the new document you created to the background image.
These are the vital steps you must not skip and the whole process above will produce no result from what you are expecting at the end it.
6. Go to the Layers panel.
7 Right-click on the image document you dropped on the background image and convert it to smart object.
8. Still on the document layer, press Control or command T to enable the free transform tool.
9. Then Right-Click to select distort or you can hold the Control or Command button while you resize the image to fit the entire desktop or laptop screen.
10. You have created your first UX mockup in photoshop.
Conclusion:
To add your image screenshot, just double-click on the image you converted to smart object. And don’t forget the size of the image screenshot should be 1920X1080px so that while resizing it will fit the screen without losing resolution.
You can use adjustment tools like adding inner shadow and feathers to make it looks more realistic.
If you do not follow the steps above, I have prepared a video on how to create website desktop mockup template in photoshop.